Sunday, 30 December 2012

Christmas/La Canadiana Empanada


ELENI’S EMPANADAS
Empanadas for every occasion

Introduces the Christmas/La Canadiana Empanada


Roast Turkey
Stuffing
Pecans
Dried Cranberries 
Turkey Gravy

Frozen unbaked $18.00/dozen 
Frozen baked $21.00/dozen
Baked & Delivered $26.00/dozen


Wednesday, 26 December 2012

Happy Gravy Making

Good morning and happy holidays readers! I hope you are all having a fabulous time spending these special moments with loved ones. Since we are out of town, I`m not in the kitchen creating new dishes. In terms of cooking, the only thing I did was make the gravy for Sandra`s Turkey on Christmas Eve.

TURKEY GRAVY

1 cup of turkey juices from the roasting pan
2 cups of boiled water
1 tsp corn starch
1 tbsp flour
salt

1. Ladle out 1 cup of turkey juices from the roasting pan into a small sauce pan. Bring to a boil.

2. Add the 2 cups of boiled water. Continue boiling.

3. In a small cup or bowl mix a bit of lukewarm water and corn starch. This is going to help the corn starch to mix well with the liquid without clumping and will make a smooth gravy.

4. Add the flour into the sauce pan and lower heat. Whisk continuously until flour is dissolved and gravy starts to thicken.

5. Last, pour in the corn starch and whisk together. The gravy should thicken up immediately. Taste for seasoning.

You can use this method to make gravy for any type of roast meat.

Monday, 17 December 2012

First Order

Classic Beef Empanada

El Greco Empanada (Spinach & Feta)


I would like to thank Pretty Bird Accesories and Northtown Way Coco Loco for chosing
Eleni's Empanadas
for their events. Best wishes to you both and may the New Year bring us together again.


Eleni's Empanadas

is taking orders for 2013. To place an order call 647.786.0377 or email to elenisempanadas@gmail.com


Mediterraneo Empanada (Shrimp & Artichoke)

Tuesday, 11 December 2012

Mediterraneo Empanada

Eleni's Empanadas introduces - Mediterraneo Empanada for the Seafood Lover.

Shrimp
Artichokes
Cherry Tomatoes
Feta
Lemon
Garlic
Salt
Pepper
Olive Oil

El Greco Empanada


 Eleni's Empanadas introduces - El Greco

This simple and delicious empanada is a perfect vegetarian option or for those who like a little Greek with their Latino.

Spinach
Feta
Egg
Mint
Salt
Pepper
Green Onion

Moroccan Chicken

This is my latest creation, Moroccan Chicken. I was inspired to make this dish after seeing something similar in the latest Chatelaine magazine.


MOROCCAN CHICKEN

9 pieces of chicken thighs, boneless and skinless
1 pint of cherry tomatoes
1 cup sultana raisins
1 cup of pimento olives
1/2 cup red wine
1 tsp cinnamon
1 tbsp cumin
1 tbsp paprika
1 tbsp mint
salt
pepper
3 to 4 bay leaves

1. In a deep pan or dutch oven, brown the chicken on both sides on medium-high heat. About 15 minutes.

2. Pour red wine into pan and simmer for 15 minutes on medium heat. Add the bay leaves.

3. Stir the chicken thighs and add the cinnamon, cumin, paprika, mint, salt and pepper. Mix together.

4. Immediately add the tomatoes, olives and pimentos. Combine and simmer for 15 minutes on medium heat. Cover at this point so the juices do not evaporate.

5. Serve with seasoned quinoa. 2 cups quinoa to 4 cups water. Add canola oil, salt and pepper. Boil for 15 minutes.

Monday, 3 December 2012

Chicken Chili

1
Chicken Chili is one of those recipes that are very versatile in that you can use any cut of chicken and any vegetable and bean combinations you can come up with. You can also substitute the chicken for beef or keep it vegetarian. My recipe is has all the basic ingredients you need to a chili base. Remember you can use the leftovers for other recipes such as Chicken Chili Bake or Chicken Burritos.


CHICKEN CHILI

1 lbs ground chicken
1 onion, diced
3 to 4 garlic cloves, chopped
2 red peppers, diced
3 celery stalks, diced
1 pint of mushrooms, diced
1 can black beans
1 cup corn
1 can of diced stewed tomatoes
1 tsp cumin
1 tsp oregano
1 tbsp cilantro
1 tbsp paprika
1 tbsp chili powder
1 tsp aji colorado (hot red pepper paste)
salt
pepper
2 cups chicken broth

1. Brown the chicken until cooked well. About 15 minutes on medium-high heat. Season with salt and pepper. Set aside in a bowl.

2. In the chicken juices saute onions, garlic, peppers and celery. Add the cumin, oregano, cilantro, paprika, chili powder and aji coloardo. Saute for 10 minutes.

3. Add the mushrooms and continue sauteing for another 5 to 10 minutes.

4. Return the cooked chicken into the pot. Stir in the stewed tomatoes, chicken broth and black beans. Bring to a simmer for 30 minutes on medium heat.

5. At 20 minutes add the corn and continue simmering.

Thursday, 29 November 2012

Carapulca

Carapulca has to be the most interesting dish I have had so far from the Peruvian Cuisine. The ingredients in this dish are unique and the flavour combinations are inspired by Africa. What makes Carapulca unique is the use of papa seca (dehydrated potatoes), peanuts and chocolate. The chocolate is reminiscent of ancient Inca cooking. Like most dishes that have a heavy sauce base, Carapulca was much more flavourful when we heated it up the next day. If you want something very different for dinner tonight, give Carapulca a try. I guarantee you will be transported to another place far in the Andes.


CARAPULCA

2 pieces of pork tenderloin, cubed
2 cups of dehydrated potato (papa seca)
2 large red onions, diced
3  to 4 garlic cloves, diced
1 tbsp aji amarillo (spicy yellow pepper paste)
1 tbsp aji colorado (spicy red pepper paste)
2 to 3 bay leaves
1 tsp cumin
1 tsp cinnamon
salt
pepper
4 cups chicken broth
1/2 cup of chopped peanuts
1/4 cup grated, bitter chocolate
1/2 cup port wine

1. Marinade the pork pieces in the port wine for an hour.

2. In a non-stick pan toast the papa seca for a few minutes. Drain into a colander and place in a warm water for an hour.

3. After the hour is up, you can begin the cooking process.

4. In a deep pan or dutch oven, brown the pork for 15 minutes on medium-high heat. Remove and set aside.

5. In the same pan or pot, saute the onions, garlic, aji amarillo, aji colorado, cumin, cinnamon and bay leaves.

6. Add the papa seca when the onions are softened. Stir and pour in the chicken broth. Let it simmer for 5 minutes.

7. Add the pork pieces back into the pot and stir. Simmer for 15 minutes. Season with salt and pepper.

8. Last stir in the peanuts and chocolate. Reduce heat to medium-low and simmer for 5 minutes.

9. Serve with fried yucca or rice.


Friday, 23 November 2012

Omelet Variations

Good Morning! Since this is an important weekend with people getting together and eating due to the "Big Game" I thought I would share all of my Omelet Variations. Omelets are so versatile and hardy. They are the perfect brunch option on any weekend. My basic omelet recipe consists of 6 eggs, 1 cup of milk, juice of 1/2 a lemon, salt, pepper and oregano. After that anything goes. You want to make it strictly vegetarian. Go right ahead! You want to mix it up? Even better! Here are some suggestions to make the Grey Cup brunch a big hit.

Classic Ham & Cheese Omelet 

Spinach & Feta Omelet

Turkey & Potato Omelet


How ever you decide to build your weekend omelet it will sure be a hit with all. Enjoy!

Classic Ham & Cheese Omelette

Good Morning! I hope this next recipe solves your breakfast or brunch dilemmas as the weekend approaches. My recipe for the Classic Ham & Cheese Omelet is simple and very satisfying. The technique I use to finish off the omelet is something I learnt while watching the Food Network - Drive-ins, Diners and Dives. Once you have the basic omelet ingredients you can add anything else to it to make it your signature breakfast classic.


CLASSIC HAM & CHEESE OMELET

6 eggs
1 cup of milk
100 g of ham, cubed or sliced
100 g of marble cheddar cheese, cubed
juice of 1/2 a lemon
salt
pepper
1/2 tbsp oregano
canola oil

1. In a large bowl beat the eggs, milk, lemon juice, salt, pepper and oregano together.

2. Meanwhile, add ham to preheated oven-proof frying pan. Brown for 3 to 4 minutes.

3. Pour the egg mixture into the pan. Top with the cheese. Allow the egg to settle at the bottom on medium-high heat. Gather the edges of the egg slightly to the centre to create a mote-like edging. This allows the egg mixture from the top to seep onto the bottom without damaging the omelet.

4. Meanwhile, preheat oven to 350F. If you have a convection oven chose that setting. The convection oven makes the omelet fluffy. Place the pan in the oven as it if preheating.

5. Once the oven has reached the desired temperature continue baking for 15 to 20 minutes.

As I mentioned above, you can substitute the ham and cheese for other ingredients. If you want to cut back on your whole egg intake use 4 eggs and 2 cups of egg whites instead.

Friday, 9 November 2012

Arroz con Leche

And last but on least the dessert. As some of you may already know I am not much of a baker. The baker in the family is my sister, Efi. She is a genius when it comes to everything dessert. I have been successful on occasion with desserts but I have to really work at getting perfect product. This weekend, I am hosting our Book Club's meeting. We are going to enjoy a Peruvian lunch of Aji De Gallina Empanadas, Causa, Lomos Saltado and to finish off the meal a comforting Arroz con Leche. It's been a long while since I made this simple dessert and I am pleased to report that I have made a successful rice pudding.


ARROZ CON LECHE

6 cups of water
2 cups of arborio rice
1 cinnamon stick
1/2 cup of maple syrup
4 cups of milk
1 cup of raisins

1. Bring water to a boil and add rice. Stir often and boil for 15 minutes. This is a good time to add the cinnamon stick. Make sure to lower the heat so the rice doesn't stick to the bottom of the pot.

2. Add the milk and maple syrup. Lower heat again and stir often until thick; about 12 minutes.

3. Add the raisins and stir. Set aside.

Causa

I remember eating this dish for the first time at the Plaitis/Berru Christmas Eve Dinner the first year Rafael and I were together. Since then it has become one of my favourite Peruvian dishes. The way I like to describe Causa to my non-Peruvian friends is that it is a potato and tuna trifle. Traditionally Causa is made in a rectangular Pyrex and it is layered. To serve, you have to use a spatula and it can get messy. In the end, although you have a delicious dish the presentation gets lost in the serving. Seeing how I'm serving Causa as one of the appetisers for tomorrow's Book Club meeting I had to think of a creative way to present and serve this dish. In the cookbook my Father-in-Law sent for me it suggests to roll the Causa. I wasn't too confident that I would be able to reproduce what is in the cookbook, so I took the basic elements and layered them in a muffin pan. To my delight not only did my Causa turn out to be delicious but also presentable.

CAUSA

8 yellow potatoes
3 cans of solid white tuna, strained
1/2 lemon
1/2 lime
1 cup milk
1 tbsp canola oil
1 tbsp cilantro paste
salt
pepper
2 ripe avocados
1/2 lime
2 tbsp mayonnaise
4 eggs, hard boiled
2 muffin pans
24 muffin cups
24 pimento olives

1. In a large stock pot boil the potatoes for 30 minutes. Set aside and cool.

2. In a small mixing bowl combine the tuna, lemon and lime juice and cilantro. Mix well.

3. In a food processor combine the avocado, mayonnaise, lime juice, salt and pepper until smooth.

4. Boil the eggs for 8 to 10 minutes. Set aside and cool.

5. Peel the boiled potatoes and mash. Add the milk and canola oil to get a smooth consistency.

6. Line the muffin pan with the cups. Add 1/2 tbsp of the mash potato at the bottom and pat it down.

7.Then add 1 tsp of the avocado mayo on each and spread over the mash.

8. Then add 1 tsp of the tuna mixture to the avocado mayo and pat down.

9. Add a slice of hard boiled egg.

10. Last add another 1/2 tbsp of mash and pat it down well to close up the layers.

11. Place in the fridge until ready to serve. Put a pimento olive onto of each piece.

Lomos Saltado

I was introduced to the dish when Rafael took me to El Plebeyo on Bathurst and St.Clair. It was the first time I had eaten at a Peruvian Restaurant and I will never forget the flavourful meal. Since then I have made Lomos Saltado once before and my Mother-in-Law made it too when she was visiting us in the summer. Tomorrow, I am hosting the next "The Swap" Book Club meeting at the condo. I have rented the Lounge Room and I am providing lunch for all our book club members - A la Peruana. Lomos Saltado is going to be our main dish.


LOMOS SALTADO

2 flank steaks, cut into thin strips
2 tbsp soy sauce
1 tbsp garlic powder
1/2 tbsp cumin
1 yellow, orange and red pepper, thinly sliced
1 red onion, thinly sliced
3 to 4 garlic cloves, thinly chopped
3 to 4 field tomato, quartered
1/2 cup red vinegar
1/2 cup soya sauce
cilantro paste or fresh cilantro
salt
pepper
6 yellow potatoes, cut into strips
1 cup basalt rice
2 cups water

1. Marinade the steak strips in the soy sauce, garlic powder and cumin for a day. This is to tenderise the meat naturally.

2. Marinade the peppers, onions and tomatoes in the vinegar, soy sauce and cilantro while you are stir frying the steak.

2. In a large wok, stir fry the steak strips. Once they are cooked through remove and set aside in a bowl.

3. Stir fry the veggies until nearly softened. Add the steak back into the wok covering the veggies.

4. Meanwhile put the basmati rice in a rice cooker and fry the potatoes.

5. Once the liquid from the saltado has almost evaporated add the fried potatoes and mix gently. Make sure not to break the potatoes. There should be some sauce at the bottom of the wok.

6. Serve on a bed of basmati rice.

Aji De Gallina Empanadas

 As you all may already know, I am in love with everything empanada. Since meeting Rafael and being introduced to the many delicioso dishes of Peru and Latin America, I have discovered "The Empanada!" Empanadas are so scrumptious and very versatile. You can put anything into empanada shells. You can have savoury empanadas or sweet empanadas. You can have them for breakfast, lunch or dinner. The first time I ate an empanada was in Kensington Market in Downtown Toronto at the Jumbo Empanada. Of all the places I have eaten empanadas since, they truly make the best empanada. They have two kinds of empanada; the classic with beef and more popular chicken empanada. In the past three years I have experimented with my own concoctions of "The Empanada" and although I am of Greek descent I have been given complements from my Prima Gilda who is Rafael cousin. I have once been told that the secret to the perfect empanada is the dough. Perhaps this person was right. I have tried many brands of empanada shells and I have even tried to make my own dough but I will have to argue with my Primo Rodrigo. I say that it's all in the filling. You can have the most delicate, buttery tasting dough but if what is inside that dough is bland, forget about it. You might as well fold up the shell, oil it well and bake them like that. To this date I have made empanadas six different ways: Classic, Chicken, Shrimp, Sausage & Egg, Canadiana (turkey) and Nutella. Today I am adding one more to my repertoire Aji De Gallina Empanada.

AJI DE GALLINA EMPANADA

6 six breasts; skin and bone on
2 large onion
5 to 8 garlic cloves
salt
pepper
canola oil
2 tbsp turmeric
1 tbsp cumin
1 tsbp aji paste
2 cups of milk
1 cup bread crumbs
2 cups chicken broth
1/2 cup chopped pecans
1 cup grated Parmesan cheese
2 package of small empanada shells (10 to 12 in a pack)
1/2 cup olive oil

1. Boil chicken breasts in water adding 1 onion, 3 garlic cloves, salt and pepper to create the broth. Boil for 30 to 40 minutes. Once the chicken is boiled remove chicken from the pot and reserve broth.

2. When the chicken has cooled down shred well and place in bowl.

3. In a dutch oven brown the diced onions and garlic in canola oil. Saute until onions are soft.

4. Add the tumeric, cumin, aji paste and bread crumbs to create a rue.

5. Slowly add the milk and broth. Stir until combined.

6. Add the shredded chicken and stir well. Simmer for 10 minutes on low heat.

7. Lastly add the pecan and Parmesan cheese.

If you don't want to make the Aji de Gallina into empanadas you may want to add more milk or broth to make it creamier. However, if you are going to be using the Aji de Gallina as a stuffing for your empanadas the ingredients listed above are just enough for the right consistency of liquid to chicken.

8. Preheat oven to 400F. If you have a convection oven even better. They puff up nicely.

9. In the centre of each empanada shell place 1 tbsp of Aji De Gallina. Be carefully not to over stuff the shells otherwise you will get leakage and possibly explosions.

10. Fold over into a half moon. Crimp and pinch dough around the edges to seal the shells.

11. Poke small holes on the top of each empanada to create a vent for the steam and brush with olive oil.

12. Bake for 20 minutes or until golden brown.

Every few months "The Swap" Book Club gets together to swap books, catch up and eat. This time I am hosting and since I've been going on about how yummy Peruvian food is to my friends, I decided to treat them to lunch - A la Peruana. These rico Aji De Gallina Empanadas are on the menu.


Friday, 26 October 2012

Classic Souvlaki

Yesterday, I was craving something from my homeland - Greece. Lately, I've been looking to other cuisines that I have neglected the fantastic flavours of Greece. My son has this thing with playing with my kitchen tools. The other day he uncovered the package of BBQ skewers I had hidden in the recesses of kitchen drawers. Usually this would get me all worked up but on this given day I was thankful because Alejandro gave me an idea on what to make for dinner. Skewers equal souvlakia. Souvlakia equal classic Greek meal along with Greek salad, rice pilaf and Tzatziki. Before making any definite plans I had to ensure that my Dad had enough propane in his BBQ tank and that my Mom would gladly take me to Highland Farms to buy quality pork for the souvlakia. Both answers were affirmative. Thus my journey back to Greek cooking commenced. The aroma of souvlaki grilling in the open air brought back memories of this little truck stop on the side of the mountain highway in between Veroia and Kozani. Everytime I would take the trip to my Dad's hometown from my Mom's hometown the bus would always stop in Kastania. Everyone would get off for a pee break and souvlaki take away. We would get 20 sticks and a bag of bread for a very low, low price. These souvlakia were loaded with oregano, garlic, lemon and salt. Mmmmm! There was nothing better. Yesterday, I recreated those souvlakia. Here's the recipe for the Classic Souvlaki.

CLASSIC SOUVLAKI

2 pork tenderloins, cubed
1 large onion, roughly chopped
juice or half a lemon
2 tsp salt
1/2 tsp pepper
1 tsp oregano
1 tsp cumin
8 wooden skewers soaked in water

1. Soak the skewers in water for a few hours. This will prevent the sticks from burning while on the BBQ.

2. Place the pork pieces, onion slices and seasoning into a large bowl. Mix well and marinate for a few hours. If you do this the night before the souvlaki will be more tender.

3. For best results grill on a BBQ.

4. To make sure the souvlakia remain tender until you are ready to serve, squeeze another half a lemon the souvlakia and cover in a roasting pan. If you don't have a roasting pan put them in a tin container but make sure you cover well. The steam from the hot meat and the lemon juice will allow the souvlaki to stay moist.

PERFECT TZATZIKI

The secret to the perfect tzatziki is to use Greek yogurt - which is rich, strained and tart. For years my Mother would strain her own 2% Astro yogurt whenever she wanted to make tzatziki. That is a time consuming method but it was the only way that she would get the perfect consistancy for the tzatziki. It cannot be too runny or too thick. The juices from the cucumber will soften up the stiff yogurt. Sometimes she would go to Sun Valley to buy the Greek yogurt which was costly at the time. Now with the onset of all these yogurt makers producing "Greek Yogurt" making the perfect tzatziki is foolproof. Here is the Perfect Tzatziki for the Classic Souvlakia.

500g Greek yogurt - I used Oikos but you can use any brand you like
1/2 cucumber, peeled and grated
3 to 4 garlic cloves, minced
2 tbsp olive oil
salt

1. Grate the cucumber and strain the excess water by placing the cucumber in a cheesecloth.

2. Add to the mixing bowl.

3. Add the minced garlic, yogurt and olive oil. Mix well.

4. Sprinkle in salt. Make sure not to make too salty. T

Moroccan Beef Stew with Quinoa

This next dish was inspired once again from one of my cookbooks - Quinoa 365. As usual, I take the main concept from the recipes from other cooks and I find a way to make it my own. Sometimes I add or omit an ingredient or I used a different method to achieve the same outcome. In this instant I have done both. The original recipe called for me to use a Tagine. Unfortunately, I don't own one of this wonderful cooking vessels. To achieve the same outcome I made the stew in a slow cooker. I love slow cookers! They are life savers. Also, the original recipe says to toast the almonds but I put them in directly with the quinoa. OK, enough exposition on to my take on on the Moroccan Beef Stew with Quinoa.

MOROCCAN BEEF STEW WITH QUINOA

2 lbs stewing beef
2 cups of tomato juice
3 large sweet potatoes, diced
1 onion, diced
1 tsp cumin
1 tsp paprika
1 cinnamon stick
salt
pepper
1 cup of quinoa
2 cups of water
1 tsp garlic & onion powder combined
salt
pepper
1 tbsp canola oil
1/4 cup sliced almonds

1. Place all the ingredients for the stew in the slower cooker: stewing beef, sweet potatoes, onion, tomato juice and seasoning. Set the cooking timer to which ever setting you like. I set it for 8 hours.

2. In a medium size pot prepare the quinoa. For best results do this just before you are going to serve the stew.

3. Add the quinoa, water, oil, seasoning and almonds into the pot. Bring to a boil. Once the water starts bubbling lower the heat to low-medium. Let cook for 15 minutes with the lid closed. After 15 minutes fluff up with a fork.

To serve, put a good helping of quinoa on the bottom of a deep dish and the spoon on top the stew. If you have some nan it's even better to help you scoop up the juices.

Wednesday, 24 October 2012

Roasted Veggie Marinara Sauce with Meatballs


Roasted Veggie Marinara Sauce with Meatballs

Afternoon All! How is your Tuesday panning out so far? I wanted to post my newest recipe last night but I was so tired by the time I put Alejandro to sleep, I just wanted to hit the pillow. So here it is. This recipe was inspired by the BBQ veggies from last Friday. Last Friday, I barbecued Indian eggplant, yellow, orange and red peppers, vidalia onion, tomatoes and garlic to along with our burgers as an alternative to a cold salad. Rafael was reminded of a Greek dish called Tourlou. Since I dressed the veggies with simple olive oil, lemon, salt and pepper, the olive oil preserved them really well. Yesterday, I was craving meatballs. Shoppers Drug Mart has a great line of calorie wise ready made foods like their lean Italian meatballs. 6 meatballs have only 150 calories. I can eat 12 of those to make up 300 calories along with a salad...BAM! I've got myself a yummy dinner. Ok, sorry back to the recipe.

INGREDIENTS

8 Indian eggplants, quartered, (sprinkle with salt and vinegar)
3 yellow peppers
3 red peppers
3 orange peppers, all cored and quartered
1 large vidalia onion, sliced into discs
3 large vine tomatoes, quartered
1 large garlic heat
olive oil
salt, pepper, oregano
4 cups of tomato sauce

1. Let the eggplant sit in salt and vinegar until all the other veggies are prepared. This will take the iodine out of the eggplant. Sometimes, the iodine in the eggplant can irritated the gums.

2. Roast in an oven for 45 minutes at 450F. If you have a BBQ, barbecue them instead. The smoky taste from the BBQ adds another layer of flavour to the veggies.

3. Cut the top of the garlic, pour some olive oil on top and bundle up in a tin foil.

4. When all the veggies are brown and a bit crispy through them all together in a bowl with the dressing.

5. In a blender add all the roasted veggies and 1 cup of tomato sauce. Chop but to not puree. The sauce should be a little chunky.

6. In a medium sauce pan, heat the veggie sauce along with 3 cups of tomato sauce. Bring to a slow boil and simmer for 20 minutes.

You can eat this with pasta on its own or add meatballs or any other protein of your choice.

Tuesday, 23 October 2012

Tuna Casserole

My husband's lunch of  Tuna Casserole from last night


This next recipe is in my upcoming cookbook - Eleni's Cooking Journey; Volume One, Canadian Classics. It is a simple meal you can make in less than an hour and it is very comforting. My husband had two servings last night.

TUNA CASSEROLE

1 bag of kamut corkscrew pasta
salt
olive oil
3 cans of flaked tuna
200 g marble cheddar cheese, shredded
2 cups of frozen peas
1 tbsp garlic and onion powder combined
1 tsp dried mustard
1 tsp cumin
1/4 tsp nutmer
2 tbsp mayonnaise
juice from 1/2 a lemon
salt
pepper
1 cup of milk

1. Boil the pasta for 9 minutes in salty olive oil bath.

2. Meanwhile, shred cheese and drain tuna. Place the tuna and frozen peas in a casserole dish.

3. Mix lemon juice, milk, mayonnaise and seasonings into a sauce.

4. Drain the pasta but keep 1/2 cup of the pasta water.

5. Add the pasta to the tuna and peas. Mix gently before pouring the sauce in. Stir again and top with cheese.

6. Put the casserole dish in a preheated oven 400F for 30 minutes.

I served this dish with beet salad. You can pair it with a nice crisp Caesar Salad or a side of pickles.

Friday, 19 October 2012

Chaufa con Chicharron - Peruvian Fried Rice with Pork

Hola mis amigos! Como estas? Yo estoy muy bien cuando voy a cocinar. Ayer yo cocinando chaufa con chicharrón.

Okay, that's enough of my Spanish for now. I really need to brush up. Sorry if I have offended any of my readers Spanish speaking readers. Lo siento mis amigos!

Yesterday, I made a Peruvian Fried Rice with Pork. You can use any source of protein for this dish. It is a perfect meal to make when you don't have a lot of time. Plus it is very comforting.


CHAUFA CON CHICHARRON - PERUVIAN FRIED RICE WITH PORK

pork tenderloin, cut into cubes
2 tbsp soy sauce
juice of half of lemon
1 tbsp minced ginger
1 tbsp or garlic and onion powder combined
canola oil
sesame oil
2 eggs
1 cup of rice
2 cups of water
2 to 3 baby bok choy, thinly chopped
2 cups frozen veggies
1 tbsp fish sauce

1. Marinate cubed pork in the soy sauce, lemon juice, ginger and seasoning for a few hours.

2. Meanwhile boil the rice. For best results use a rice cooker. 1 cup of rice to 2 cups of water is the perfect ratio. It will make about 4 cups of cooked rice.

3. In a very hot wok, heat the canola and sesame oil. Add the pork and stir continuously on high heat.

4. Once the pork is cooked through push to the side and crack the 2 eggs in the wok. Scramble vigorously. Add to the pork as the egg starts to cook.

5. Push the pork and egg to the side of the wok. Add the cooked rice along with the fish sauce and another generous dose of soy sauce. Reduce heat.

6. Start combining the rice, pork and egg. Add the bok choy. Stir continuously.

7. Last add the frozen veggies. It is a good idea to rinse off before adding to the wok. The water from the frozen veggies will add a little moister to the fried rice.

8. I like to serve my fried rice with steamed bok choy.

Wednesday, 17 October 2012

Bamies me Kota - Okra with Chicken

Good Morning Fellow Food Lovers! How are you on this Wednesday morning? Today's recipe comes from a dish that is well known in my Dad's hometown of Kouvouklia. The combination of okra and chicken is remininscent of dishes from Asia Minor, where my father's lineage originated from. For fellow Greek readers, you will know this type of cuisine as Politiki Kouzina - that came from the Poli - which is Constantinople.

Bamies me Kota - Okra with Chicken


BAMIES ME KOTA - OKRA WITH CHICKEN

6 chicken thighs, with the skin on
1 tbsp paprika
1 tbsp cumin
1 tbsp mint
1 cinnamon stick
2 to 3 bay leaves
salt
pepper
canola oil
olive oil
1 cup of white wine
1 large onion, diced
3 to 4 garlic cloves, chopped
2 cups of tomato juice
2 packages of frozen okra

1. Toss the chicken thighs in the seasoning before browning.

2. In a deep pan or dutch oven, heat the oils and brown the chicken on both sides. The skin should be crispy.

3. Lower the heat and add the white wine, cinnamon stick and bayu leaves. Simmer for 30 minutes on low heat.

4. After 30 minutes remove the chicken and place them in a pyrex. Keep the oven setting to warm and put the chicken in the oven.

5. Meanwhile saute the onions and garlic in the chicken juices. Slowly add the tomato juice and simmer for 5 miuntes.

6. Add the okra, stir in gently and cover to simmer for 15 minutes on meduim-low heat.

7. After 15 minutes replace the chicken thighs into the pan or dutch oven.

Serve with hearty bread, feta and olives.


Tuesday, 16 October 2012

Classic Chili

Classic Chili
This is a classic recipe perfect for those chilly fall nights. The ground beef and veggies is comforting. I like to eat my Chili with corn tortillas.


CLASSIC CHILI

2 lbs ground beef
1 large onion, diced
3 to 4 garlic cloves, chopped
canola oil
olive oil
salt
pepper
cumin
paprika
chili powder
oregano
aji - hot yellow pepper paste
1 pint of mushrooms, sliced
1 red pepper, diced
1 yellow, pepper diced
1 orange pepper, diced
2 celery stalks, diced
2 cups of tomato juice
2 cups of water
1 can of black eyed peas
1 can of Mexican red beans
100 g marble cheddar cheese, shredded

1. Brown the onion and garlic in a mixture of canola oil and olive oil.

2. Add the ground beef and seasonings. Brown well. Set aside.

3. In ground meat juices saute the peppers, celery and mushrooms for 10 minutes.

4. Add the ground beef, tomato juice and water. Simmer for 30 minutes in medium-low heat.

5. Last add the beans. Stir in gently and simmer for another 10 minutes.

6. When you plate the Chili add a heap of cheddar cheese on top and watch the magic of melting cheese. Mmmmmm!

Monday, 15 October 2012

Shrimp Mediterraneo

This simple and delicious dish was inspired by my trip to New York City a few years back. Suzanne and I had went to an Italian Restaurant that was highly recommended by a friend, Tony Maloni's on 52nd Street. I'm we went there because the food was unforgettable. At Tony Maloni's you order al carte and the portions come in extra large sizes for sharing. Since it was my birthday we decided to have some seafood to celebrate. We ordered this scrumptious shrimp appetizer. The plate was full of large prawns and succulent artichokes and tomatoes that it was a meal all on it's own. I will never forget the mouth watering flavours of this dish. When I got back home I recreated this dish for my family. My father was really impressed and my sister asked for the recipe. Now, I have tranformed the basic concept and add a bit of a Greek touch.

SHRIMP SANTORINI

30 - 40 peeled and devined large tiger shrimp
1 can of artichokes, quartered
1 pint of cherry tomatoes
200 g crumbled feta
3 to 4 garlic cloves, chopped
juice of 1 lemon
salt
pepper
oregano
2 tbsp olive oil

1. Rinse the shrimp in a colander.

2. Meanwhile, quarter the artichokes if they are not already quartered.

3. Place the shrimp, artichokes, tomatoes, feta, lemon. olive oil and seasonings in a rectangular or square pyrex.

4. Preheat oven at 425F.

5. Bake in the oven uncovered for 25 minutes.

You can serve this as an appetizer or as a main on pasta or rice. I ate it on a bed of greens. Perfect for people on a diet.

Friday, 12 October 2012

Thanksgiving Turkey and Stuffing

Preparing a roast turkey is truly an act of love. Although, there is nothing more satisfying than turkey and stuffing on Thanksgiving, the cooking process is taxing. My Koumbara, Georgia asked me on Thanksgiving, "What time did you start cooking? You must have been in the kitchen all morning!" I chuckled because she was being kind. When I told her that I was preparing the turkey from the day before I think she nearly fell over. Ok folks here it is. The long awaited Roasted Turkey with Stuffing recipe.
Oven Roasted Turkey


OVEN ROASTED TURKEY

1 12lbs turkey
1/2 lemon
1 stick of butter, softened
1 tsp sage
1 tsp thyme
1 tsp garlic powder
1 tsp onion powder
2 celery stalks
2 onions, halved
4 to 5 garlic cloves, crushed
a few bay leaves
4 cups of white wine
salt
pepper


1. Whip the butter with the other seasonings until combined well.

2. After cleaning out the turkey wash the torso with the lemon.

3. Place the celery stalks, onions, garlic, bay leaves and wine on the bottom of the roasting pan.

4. Place the turkey on roasting rack above the vegetables. Smother the turkey with the seasoned butter both under the skin and on top. Make sure to get all the crevices.

                                                                                       STUFFING
Add caption

2 cups of long grain rice
1 package of Canadian bacon, diced
1 onion, diced
4 to 5 garlic cloves, chopped
3 to 4 celery hearts, diced
2 cups of shredded mozzarella cheese
1/2 cup pine nuts
1 parsley, thinly chopped
salt
pepper
1 tsp sage
1 tsp thyme
3 cups of chicken stock


5. In a dutch oven or deep pan prepare the stuffing.

6. Brown the bacon until slightly crispy. To get best results add a bit of water to keep from burning.

7. Push the bacon to one side and add the onion, garlic and celery. Saute gradually introducing the bacon into the mix. Season with sage, thyme, salt and pepper.

6. Lower heat. Add the rice, chicken stock and water. Simmer on medium low heat for 15 minutes. You want the rice to soften up a bit.

7. Add the pine nuts, cheese and parsley. Lower heat and stir gently. Let simmer for another 5 minutes.

8. Now for stuffing the big bird. You want to start by stuffing the cavity of the turkey first. Make sure not to over stuff because the rice will expand while cooking. Sew the cavity opening with needle and thread. Turn the turkey over very carefully to expose the cavity near the breast plate. Sew that together as well.

9. Cover generously with heavy duty tin foil. Make sure you get the entire pan covered if you don't have a roasting pan with a lid. You don't want your turkey juices to burn.

10. Place the stuffed turkey in the fridge for the night.

On the day you want to have your Thanksgiving Feast make sure you give the turkey enough time to cook properly and in a timely fashion. For a 12lbs bird you will need 6 hours of roasting time. My guests were arriving in between 2 pm and 3 pm. My turkey had to be ready at 1 pm so that it could rest and then be carved. I put my turkey in the oven at 6 am. That's right ladies and gentlemen! I'm surprised I didn't keel over half way through dinner.

11. Preheat the oven to 400F.

12. Uncover turkey and place in the preheat oven. Roast uncovered for 1 hour. This will ensure that the skin of the turkey crisps up nicely.

13. After the hour over, lower the temperature to 325F. Take the turkey out and baste with the juices from the pan.

14. Cover with the foil very well. Return to the oven and continue roasting for 2 hour stretches at a time. Each time basting as you go.

Six hours later you should have a golden, crispy turkey bursting with yummy goodness ready to carved and served.

* I highly suggest you invest in an electric knife. It really carves the turkey gently and precisely.

Monday, 8 October 2012

Thanksgiving Feast

Happy Thanksgiving everyone! I hope you are having a wonderful time and I hope you eat a sumptious meal today. In a few hours, our condo will be full with family and friends. This year we are celebrating with four new people. Alejandro's Godmother and Godbrother, a Godmother's friend and my former student from Lac La Croix. It's going to be a full house but that's what I love.

Here's the menu for today.

Appies
Spanakopita
Tiropita
Fiery Feta Fondue - Tirokafteri

Mains
Roasted Turkey with Rice Stuffing
Roast Beef
Asparagus
Roasted Oregano Potatoes
Roasted Sweet Potatoes
Greek Salad

Dessert
Apple Pie
Pumpkin Pie

Thankfully my Mom's making the Roasted Oregano Potatoes, Koumbara is bringing the pites and my Sister made the dessert. God bless everyone who is going to contribute to today's meal. God bless everyone who is going to enjoy today's meal. I wish I had a bigger place to invite more people. Maybe next year I'll book the big party room downstairs. Anywho!

The recipes and photos for the Turkey and Roast Beef are coming soon.

Sunday, 30 September 2012

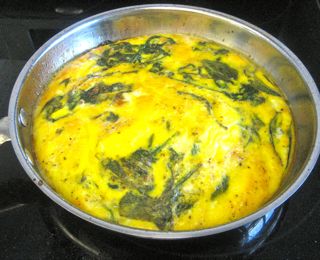
Spinach Omelette

This dish is an all time favourite of the whole family. Alejandro loves this the most. You can serve it for anytime of the day. This morning I served it to Rafael, Carmen and Alejandro for breakfast. Sometimes I throw in some feta, or chevre to add flavour and texture. This morning I kept it simple.

SPINACH OMELETTE

5 large free-run eggs
1 cup milk
2 cups baby spinach
1 tbsp Italian seasoning (Club House)
canola oil
salt
pepper

1. Preheat oven at 350F. If you have a convection option on your oven use it. It makes the omelette fluffy.

2. Meanwhile, beat the eggs and milk, season with salt and pepper.

3. In oven proof frying pan, heat the canola oil. Saute the spinach. Sprinkle with the Italian seasoning.

4. Once the spinach is wilted, pour in the egg mixture. Let it set on the bottom before placing in the oven.

5. Continue the cooking process in the oven for 20 minutes or until the omelette puffs up.


Monday, 24 September 2012

Biftekia Kokkinista - Stuffed Greel Meatballs with Red Sauce

Over the weekend, we had some friends come to dinner to help us celebrate the arrival of Autumn. The main dish was Biftekia Kokkinista, Roasted Oregano Potatoes and Rice Pilaf. This is traditional fall dish in Greece and very popular at one of the restaurants on te Danforth. Although it is not a very elegant dish it is hearty and conforting. Perfect for a crisp Autumn evening.

BIFTEKIA KOKKINISTA - STUFFED GREEK MEATBALLS WITH RED SAUCE

3 lbs ground meat
3 eggs
3 cups bread crumbs
1 cup tomato sauce
2 large onions. diced ( 1 onion for the biftekia, 1 for the sauce)
4 to 5 garlic cloves, diced ( separate the garlic )
1 tbsp cumin
1 tbsp mint
1 tbsp oregano
1 tsp cinnamon
salt
pepper
100 g of cubed gouda

Kokkinisto - Red Sauce
3 cups tomato sauce
1 tsp oregano
1 tsp mint
1/4 tsp cinnamon
1 tsp balsamic vinegar
salt
pepper

 1. Combine all the ingredients for the biftekia. Make an oval and place a couple of cubes of gouda in the centre. Cover with another oval paddy and roll together making sure the two meat paddies combine well. You don't want the cheese to seep out in the cooking process.


2. Place all the biftekia in a roasting pan. I did this the day before for two reasons. To save time the day of and to allow the biftekia to stiffen up a little.

3. Brown each bifteki on both sides so that they have a nice crispy top and bottom.
4. Place browned biftekia in a pyrex.
5. Once all the biftekia are nice and snug in the pyrex you pour the kokkinisto over the biftekia.
6. Preheat oven at 425F. Cover biftekia with foil and continue cooking in the oven for 25 minutes.


7. After 25 minutes, uncover and put the pyrex back into the oven at 350F for 15 minutes for the excess water to evaporate from the dish. You don't want a soupy consistancy.

8. While you are preparing and cooking the biftekia, you should make the kokkinisto. Saute the onion and garlic. Add the spices. Gently add the tomato sauce and balsamic vinegar. Bring to a boil and then simmer for 30 minutes on low heat.

Thursday, 20 September 2012

Tomato Sauce Day

Every September it's harvest time at the Karipidis Home. When we were kids my parents use to harvest all kinds of yummy things such as Roasted Red Peppers, Pickled Vegetables and Tomato Sauce. I suppose for my parents is was a way to spend time with the family because for 3 weekends in September we would gather in the backyard and pitch in to get the job done. I fondly remember my Mom's stuffed pickled Cubanelle Peppers. She would grate cabbage, carrots and celery which then was stuffed into these tender Cubanelle Peppers. Each jar would fit 4 to 5 of these stuffed lovelies. Her pickling concoction was simple, boiled salt water with vinegar and loads of garlic. The Roasted Red Peppers were the most painstaking because after being barbecued, they had to sweat out in plastic bags and then their charred skin had to be peeled off very carefully not to damage the succulent flesh. After the delicate operation, the red peppers were placed in ZipLock bags before being stored in the freezer. Since the harvesting of the red peppers was the most tiring, my Mother only took them out to be consumed on special occasions. Thankfully, we never had to wait to long to dig into the sweet yumminess of the peppers because Thanksgiving was only a couple of weeks away. Now, the only item we harvest is the tomato sauce.


Italian Lentils with Sausage

Lentils are a staple in the Greek and Peruvian diet. Turns out lentils are popular in other cultures as well. This recipe was inspired by Jamie Oliver's - "Jamie's Italy". I like the combination of lentils and sausage. The Greeks eat them as a soup. The Peruvians eat them chunkier with rice and fired eggs. This is a nice hearty alternative.

Italian Lentils with Sausage

2 cups of green lentils
2 cloves garlic
2 bay leaves
1 cups parsley, chopped
2 cups of tomato sauce
1 red onion diced
2 to 3 garlic cloves diced
1/4 tsp cinnamon
2 tbsp red wine vinegar
salt
pepper
1/4 tsp hot chili peppers
1 package of sausage

1. Place lentils in a large stock pot with garlic, and bay leaves and boil for 40 minutes.

2. Meanwhile, saute onions and garlic until the brown.

3. Add the cinnamon, 1 tbsp red wine, salt, pepper and hot chili pepper flakes.

4. Gently, add tomato sauce, boil and bring to a simmer.

5. Place sausages in a large, oven-safe frying pan with some olive oil in a preheated oven at 450F. Roast for 15 minutes on each side.

6. When the lentils are done cooking, strain the liquid, remove bay leaves and garlic cloves. The garlic cloves will be soft. Use a small fork to mash them up. Put the lentils back into the pot, drizzle olive oil, 1 tbsp red wine vinegar, garlic and finely chopped parsley. Stir together.

7. To plate this dish, laddle a good helping of lentils in a shallow plate, spoon on a couple of spoonfuls of the tomato sauce and place sliced sausage on top.


Sunday, 9 September 2012

Spinach & Quinoa Soup

The best recipes sometimes come out of things you already have in your kitchen. That's where I got inspiration for lunch today. It was simple and very healthy. Try this this easy soup when you want to load up on iron, protein and Vitamin D.

SPINACH & QUINOA SOUP


1/2 cup quinoa
1 cup water
half bag of baby spinach
4 cups tomato juice
1 tbsp garlic & onion powder combined
1 tbsp dried mint
salt & pepper
canola & olive oil

1. Bring 1/2 quinoa with 1 cup water. Simmer for 15 minutes on low heat.

2. Meanwhile, in a medium sauce pot saute baby spinach in the canola and olive oil.


3. Once spinach is softened add the seasonings and the tomato juice and bring to a slow boil.

4. By the time the quinoa cooks the tomato juice will boil down nicely. Add the quinoa to the spinach. Stir and serve with crusty bread.

Friday, 7 September 2012

Spanakopita II


Spanakopita II

 Here are the pics and instructions on how to make my Spanakopita.

Ingredients

2 bunches of fresh spinach
salt
pepper
 1 tbsp mint
 1/2 tbsp garlic powder
1 egg
2 bunches green onions
200g feta cheese
olive oil
1/2 cup melted butter
1 pack of filo

1. Cut the stems off the spinach and wash well.

2 Sprinkle with salt and mash up the spinach with your hands. This is my Giagia's method of wilting the spinach. It also adds flavour to the spinach straight away.

3. Chop green onions and add to spinach. Sprinkle pepper, mint and garlic powder. Mix well.

4. Preheat oven at 400. If you have a convection oven turn it on. The air makes the filo.

5. Grease the pan with enough oil so that the filo doesn't stick. Layer the pan with 8 to 9 filo sheets.

6. Fill the pan with the spinach, crumbled feta and 1 beaten egg.

7. Cover the filling with another 8 to 9 filo sheets. Each time you add a layer to the to and bottom of the pan oyu must brush olive oil to keep the filo moist.

8. Once you are done with the last layer it is a good idea to pre-cut your spanakopita so that when it is done baking and you want to cut it, it is easier.

9. Then you are ready to pop it in the oven. Bake for 40 minutes on the 4 level.

10. You can eat this nostimo spanakopita for a snack, breakfast, or with a simple Greek Salad.

11. Enjoy!

Gemista - Greek Stuffed Peppers


Gemista - Greek Stuffed Peppers

Good day all! As I promised, I am posting my recipe and photos of one of my favourite Greek dishes - Gemista. They are the perfect answer to comfort food. I love everything with ground meat. This dish is considered a summer dish because the peppers are in season in the summer. A couple of days ago No Frills was having a $1 sale. Of course, I went to get the deals. One of the items they had on sale for $1 were green peppers. I haven't made Gemista in a long, long time so that was something new for me yesterday. If you decide to try my recipe please let me know how they turn out and if my instructions work.

INGREDIENTS

12 large green peppers ( you can use other peppers)
2 lbs of ground beef ( you can mix half beef/half pork)
1 large onion diced
1 pint of mushrooms diced
3 garlic gloves diced
3 cups of tomato sauce
1 tsp of long grain rice for each pepper (my Mom puts 1 tbsp much makes the stuffing more ricey. If you are watching your diet, like I am you don't need that much rice)
canola oil
1 tbsp mint
1 tbsp oregano
1/2 tbsp cumin
1 tsp cinnamon
salt pepper

INSTRUCTIONS

1. Preheat oven to 450F

2. Wash and cut the crowns of each pepper.

3. Shell out the heart of the pepper but do not discard.


4. Wash the seeds off the hearts of the peppers and dice the flesh. (My grandmother use to do this because when my Mom was growing up they were struggling. So that they don't waste any precious food, my Giagia would add the heart of the peppers in the stuffing. They are full of nutrients.)


5. I made my own tomatoe sauce. Use 8 to 10 ripe tomatoes. Put them in a steam bath for 20 to 30 minutes so that the skin will peel off. Dice and mash the tomatoes after sprinkling in some salt and a pinch of sugar. (This will balance the acidity in the tomatoes and when it cooks in the filling it won't be tangy.)


6. Now you are ready to make the stuffing.

7. Saute the diced pepper hearts, onions, garlic and mushrooms for 10 minutes of medium/high heat in the deep pan.

8. Add ground meat to brown. Stir in for 5 minutes and then add the spices: mint, oregano, cumin and cinnamon. Brown for 5 to 10 minutes.
9. Lower heat to medium. Add 1 tsp of rice for each pepper into the centre of the mixture, followed by the tomatoe sauce. Let it start to bubble a little.

10. Reduce heat to low/medium and simmer for 20 minutes. The rice should start cooking at this point before putting stuffing into the peppers.


11. Now you are ready to stuff the peppers.

12. Place hollowed peppers into a deep roasting pan. Sprinkle with salt. You need about 3 to 4 tbsp of stuffing for each pepper.

13. If you have remaing tomatoe sauce pour some in the middle and top the peppers with a lid. Pour canola oil over each pepper. 14. Pour 1 cup of bolied water into the base of the pan. Cover with tin foil and roast for 45 minutes.

15. At 45 minutes, uncover and roast for another 45 minutes.

16. I like my gemista a bit crispy on the top so I broil them for 15 minutes at 500F. It's a personal preference.

17. Serve with a fresh Greek Salad, olive and pita.